How to grow food in the city
Our essential guide on how to get growing food.
- Manage your garden pests
- Get your hands dirty: Compost, mulch and worms
- Winter’s best friend: Green manures
- Easy Peasy: Sow peas, broad beans and onions for overwintering
- Growing veg for a winter garden
- Grow, protect, deter: Dealing with slugs and snails
- Sowing salad in the autumn
- The mildew curse
- Getting the most from your tomatoes in September

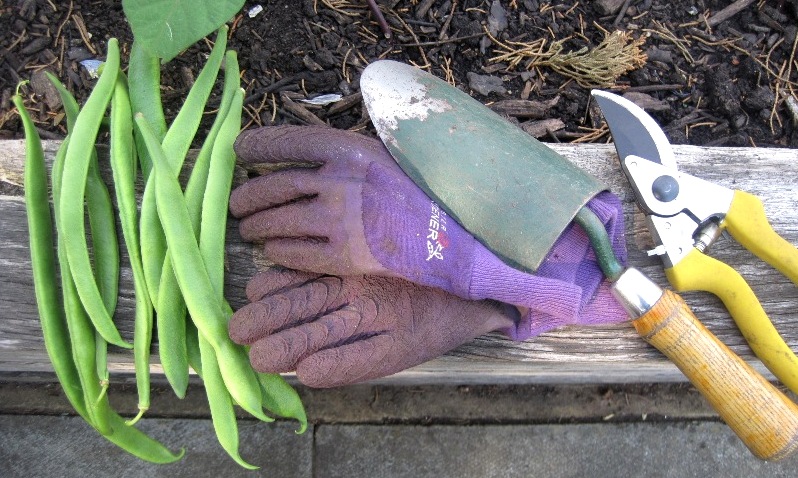
Although sharing your garden with wildlife is a necessary part of a healthy site, sometimes there is also a need to take decisive action against pests doing serious damage. Once you identify a pest in the garden, it can help to launch an attack on it from multiple angles.
- Protect your plants: Use nets and rings (cut plastic bottles work well) as a physical barrier
- Remove the pest: Manually take off the pests you can see, e.g. cut off the top of broad beans if they are covered in aphids or organise a ‘slug and snail hunt’ and re-locate the culprits outside your garden (at least a few 100 yards away)
- Repel with natural methods: Make a garlic spray for aphids with 1 crushed head of garlic (skin on) steeped in 1L of boiling water (cooled and strained), or spray milk on leaves to avoid mildew
- Prevent any more from coming in: Limit pests habitats like planks of wet wood on the ground which harbour slugs and snails, and promote pest predators by offering them inviting new home. For example, build a headgehog house, solitary bee box or shelter for ladybirds, or leave a nettle patch to grow.
 Get your hands dirty: Compost, mulch and worms
If you're using a compost bin in your garden, by now it should be getting quite full, and those with fruit trees and bushes will likely be piling in more over the winter. I usually harvest my compost twice a year; once in the autumn (now) to make space for pruning cuttings and once in spring to add to my freshly planted beds.
I use a simple plastic bin to store my ready-to-use compost, which leaves my active composters empty and ready to receive twigs and leaves from pruning.
I don’t mulch my garden with compost in the autumn as the compost will leach its goodness into the ground and not actively be used by plants. I prefer to keep it for spring, when it can warm the soil and provide nutrients for young seedlings. At this time of year I mulch with wood-chips, and other low-nutrient materials, that will act as a blanket for the soil.
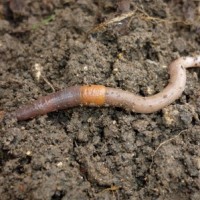
For those who haven’t already, it’s definitely worthwhile investing in a wormery. This is a simple structure where worms (from the Eisenia family) can transform food waste into worm cast (incredibly rich compost-like material) and worm tea (a liquid brimming with healthy soil bacteria), which are both amazing support for healthy soil and plants. As days get colder, wormeries need a bit of cover so I move mine close to the shed, away from cold winds, and wrap it in bubble wrap. Like this, it will keep producing liquid throughout the winter which I store in a container and use it to wake up my soil bacteria in spring.
Winter’s best friend: Green manures
As organic gardeners, our mantra is "don’t feed the plant, feed the soil." This means focusing on keeping the soil healthy, full of nutrients and beneficial microorganisms. One of the many ways to do this is to use green manures, particulalry during the winter when beds may be otherwise empty.
Green manure is the use of plants to improve soil health and also cover bare soil, either in between crops or during winter. Green manures are chosen based on what nutrients they can contribute to the soil, such as nitrogen, and are generallly dug into the ground about a month before a new crop is planted (e.g. dig green manure in March for planting spuds in April).
In London, if you have bare heavy clay soil, it can get waterlogged in the winter and it can be hard to cultivate in summer. Planting green manure through the winter can help it drain and keep its structure without compaction, making spring planting easier.
Green manures also improve the soil chemically by adding nutrients. This may be from helping draw nutrients from deeper layers of the soil to the surface, and/or by releasing nutrients while rotting underground after being dug in.
Some green manures, such as peas and beans in the legume family, have additional capacity to store nitrogen – a valuable plant nutrient – from the air and fix it in the ground. I tend to favour legumes for green manure, but there are plenty to try, such as
- Legumes, like field beans, forage peas or winter tares (vetches)
- Mustards
- Phacelia (who's purple flowers are stunning in the spring!)
- Clover
- Grazing rye
- Wainter tares
Your green manure should reach a decent size (around 4 leaves) before the first frost. Be careful to ensure that you dig it into the soil in spring before it flowers so the seeds don't spread around your garden. That being said, crimson clover and phacelia are great for early pollinators so I tend to leave a row or two anyway!
Easy Peasy: Sow peas, broad beans and onions for overwintering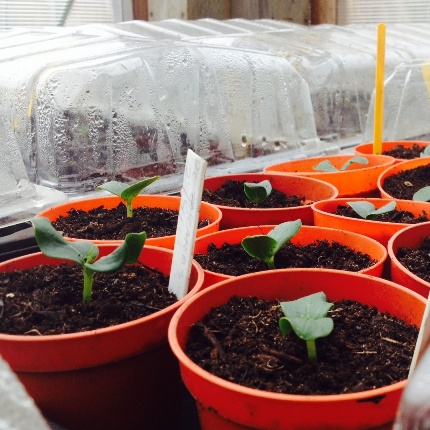
The first crisp mornings have appeared this week; the grass in my front garden had the blue tinge of water droplets and the air was fresh, I love these days! When you start putting a jacket on in the morning, it’s time to think about your overwintering legumes and onions that will survive as small plants over the winter and provide an early crop in February March next year.
Overwintering is all about timing: plant them too late and the first frost will strike before they have reached a size that allows them to survive the winter, plant them too early and they will get too big, potentially flowering and dying before the first frost. And as you know, each year is different. So my personal clue is the jacket indicator: if I need a jacket in the morning, I can sow my overwintering beans, peas and onions.
Seeds and onion seedlings put in the ground at this time of the year need to be covered as mice LOVE peas and beans, and pigeons and squirrels are very curious about onions. To avoid hungry mice, you can also sow your beans and peas in the glasshouse and transplant them late October. Onions will be ready next summer, so be mindful where you plant them now as they will stay until July next year. You can also grow salads and other small ‘catch crops’ like radishes to make use of the space in between your rows.
My favourite overwintering legumes & onions are the following:
- Broad beans: Aquadulce Claudia are bred for overwintering and will produce heavy crops of plump broad beans early spring
- Peas: Twinkle are peas you grow for their shoots not their pods, and do very well outside with just a bit of protection; Sow them thickly every 3 weeks or so and harvest tender shoots for your salads
- Peas: Kelvedon Wonder and Meteor are great varieties that will produce fat sweet pods early next year
- Onion: Shenshyu Yellow are a super hardy Japanese onion variety that overwinters beautifully while Electric Red will be a bright spot in your garden and a brilliant onion for salad
Growing veg for a winter garden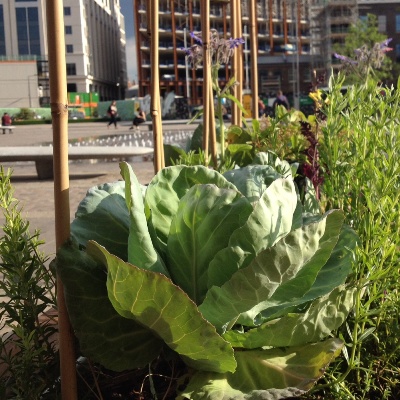
Early October is a great time to plant salads and most winter veg outdoors, after they have been started by seed indoors in a few weeks earlier. They should be big enough to sustain cold nights with stems roughly the size of a pencil. I usually have a mix of the following:
- Winter salads and Chinese leaves (see previous post for a species list)
- Rainbow chard (the colours will brighten up any garden over winter!)
- Leeks
- Celery/ celeriac
- Winter peas
- Overwintering broad beans
- Winter onions
- Kale: cavolo nero, spring cabbages, broccoli and Brussel sprouts
- Late carrots, radishes and beetroots
Planting out in well prepared soil with the right protection will increase their survival chances. Whatever protection you choose, keep in mind how easy (or not) it will be to access your crops as this may affect how much care you can give them. All covered beds should be checked fortnightly (if not weekly) to assess slug damage.
For cabbages, I use a net to keep away pigeons. It is key to ensure the cabbages don’t touch the net otherwise the piegons will still be able to eat them. You can also cover them with horticultural fleece. U-shaped tent pegs and hula hoops are great DIY frames for netting. Chop the hula hoops in two for semi-circular structures, then extend nets or fleece on top.
For smaller crops like salads, chard or young seedlings I use 500ml plastic bottles cut at the bottom and without lids. These protect from slugs and help keep plants warm in daytime. Don’t forget to take the bottles off once your plant’s stem is strong enough or the bottle may get stuck. You can also use bigger bottles for bigger crops. Make sure they stay clear with no algae growth. If so, wash them in soap and re-position.
Grow, protect, deter: Dealing with slugs and snails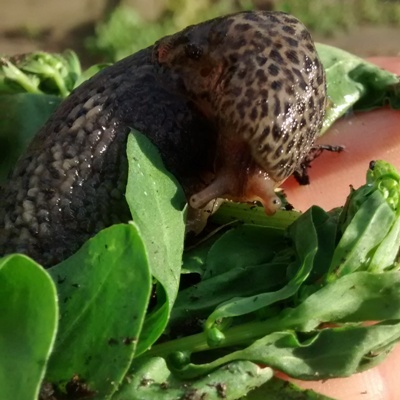
If your plant stems have been munched or your seedlings have disappeared overnight, you’ve felt the effects of slugs and snails in your garden! I am a firm believer in growing with nature and not against it so aim to reach an ‘80/20’ ratio: I get 80% of what I grow and wildlife gets 20%. Rather than obliterating your slimy population (or using dreaded slug pellet), it’s all about managing them properly. There are a few different approaches I suggest combining
Grow strong plants
Avoid sowing directly in the ground, and instead start your seeds in a glasshouse or protected area and then plant them outside a bit later than normal. This helps plants develop a stronger stem, which is less juicy and appetising for slugs.
Protect
- Use cloches for your prized lettuces (like cut plastic bottles) and rings for bigger crops like courgettes and brassicas. Ensure there are no slugs inside the area before placing the cloches.
- Copper tape works well around raised beds and pots as it gives slugs and snail small electric shocks as a deterrent that isn’t deadly.
Deter
- Limit breeding ground by checking your seedlings’ roots and disposing of slugs and eggs.
- Slugs like protected areas like beneath plant pots, in spaces between containers, under plank of wood, etc. Try to limit slug-friendly spaces in your garden and check weekly those that remain, removing slugs as you go.
- Slugs and snails don’t like garlic so spray your crops with our trademark garlic spray: Mix 1 crushed head of garlic with skin on, with 1 litre of boiling water, cool and spray it liberally. Be aware garlic spray is strong and kills pests (like aphids) and non-pests too (like ladybirds), so use with caution!
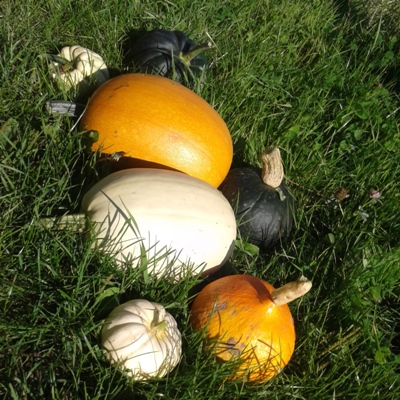
It’s been hot lately, but have you noticed that the trees are becoming a darker shade of green. We are in the middle of what I call the ‘summer plateau’: plants reached their peak size and colour a couple of weeks ago, and they are hovering on their top growth plateau before the autumn takes over and everyone starts getting ready for winter.
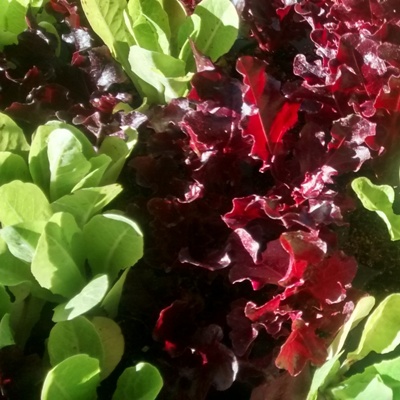
As a food lover, autumn is a brilliant time; nuts, mushrooms, pumpkins and all kinds of other delicious goodies make their appearance. As a food gardener, the cooler days mean you can grow spicy and exciting leaves again without the fear of seeing them bolt (go to seed) under the blazing sun. Sow your salad from now until early November for fresh leaves that will lift any meal. You can keep sowing after that but it will have to be under cover as most salad will only germinate if the temperature is over 1.6 degrees Celsius.
Like with all leaves, you can sow directly in the soil (but they will need protection from slugs) or in seed trays (my choice) inside or in a glasshouse with well-draining soil. I then prick the seedlings out and transplant them after they have two ‘true leaves’. The first two leaves of a seedling always look a bit different to the actual vegetable, so the first two ‘true leaves’ are really when you have a minimum 4 leaves on your seedling.
My favourite leaves to plant at this time of year are from the brassicas (cabbage) family, spicy and often gorgeous, such as
- Mizuna
- Mustard Green in Snow
- Mustard Giant Red
- Mustard Golden Streak
Other leaves that can fit anywhere in your crop rotation (if you follow one)
- Chard, which is delicious, beautiful in rainbow varieties and can survive frosts and snow
- Coriander
- Corn salad and all year round lettuce
- Claytonia, a gorgeous fleshy circular leaf that you can’t buy in shops
Enjoy the cooler days & spicier leaves!
We have been treated to very warm days this September, and as well as ripening our tomatoes and keeping us smiling, it has also slowed down the dreaded powdery mildew. Powdery mildew is a fungal infection that forms a white or grey powder on plants leaves and will eventually kill it. It affects most squashes, including courgettes, marrow, pumpkin, squashes and melon, and is common in damp, shady, and humid areas. Once it begins spreading on the plant leaves it is difficult to control, although there are a few things you can do to slow its spread such as
- Remove the worst affected leaves and dispose of the. However, it’s best to avoid composting these leaves as the fungus might survive the composting process.
- Allow for air circulation between your plants by taking some bottom leaves away. Next year try planting them further apart from each other.
You can also easily make a homemade spray to help prevent the mildew from spreading, just spray the leaves weekly with:
- Garlic spray, which is a strong antibiotic and antifungal, can be made by mixing 1 mashed head of garlic (skin on) with 1 litre of boiling water and then letting it cool
- Pure worm tea is a soup of beneficial soil bacteria, which will compete with the mildew and make it harder for the fungal infection to spread
- Milk, especially milk that has gone off, can also be effective as its bacteria will compete with the mildew on the surface of the leaves and stop it from spreading
For next year, plant your squashes further from each other, in full sun and start spraying before the mildew sets (in May or so). You’ll be ahead of the curve and you might even prevent powdery mildew all together.
In the meantime, get your garlic and your spray bottle out and work to get the most of your courgette before the wet weather takes over!
Getting the most from your tomatoes in September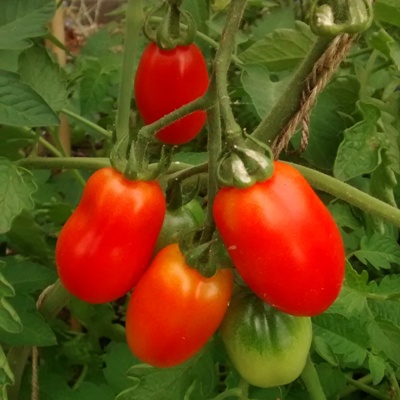
Tomatoes originate from Mexico, and need a long, wet and warm summer to produce sweet and juicy fruits. Here in the UK we might not always have the ideal climate for them, but there are a few key way to get a bountiful harvest nonetheless! Here are my top tips for tomatoes growers in early September:
Right now your tomatoes fruit must be formed and it’s time to give them a little push to help with the ripening process.
- Pinch off the top of the plants and up to 80% of its leaves. This will stop the tomatoes from photosynthesising (making energy from the sun, which is used to get the plants growing), and force the tomato plant to use energy from the ground to ripen its fruit. You are left with a pretty bare bush, and soon enough you’ll get red tomatoes.
- When picking your tomatoes always leave a red tomato on each truss: it will help the tomatoes left on the truss ripening.
- Lay down banana peels under your plants: if you have ever kept any fruits with your bananas, you’ve probably noticed how these fruits ripen and even spoil very quickly. It is due to the bananas ability to produce a gas (Ethylene) which speeds up the ripening process in fruit. Bottom line is: keep your banana skins to ripen your tomatoes (then feed to your worms or compost), and don’t store any other fruits with your banana (they need their own fruit bowls)
And if the weather gets too bad and you have to pick barely orange and green tomatoes, there are still things you can do:
- Lay your not-so-ripe tomatoes on your windowsill where they can see the sun
- Add them to a fruit bowl with bananas or apples (same reason as above, they produce a ripening gas)
- Make green tomato chutney!


Menu
Support our work
Your donation will help communities grow more food in gardens across London.
Capital Growth is a project of Sustain: the alliance for better food and farming.
London is Good to Grow: local food gardens open to the public this April
Grassroots campaigners are victorious as Hackney Council passes the Right to Grow
Right to Grow’s on the ballot: the More Natural Capital local election pledges
Publications

A year in London’s food gardens: Capital Growth network survey findings 2023-2024

A year in London’s food gardens: Capital Growth network survey findings 2022-2023

Reflections on Rootz into Food Growing
Saving a food growing site that is under threat
Protecting a food growing site for the future